Setting up the Movistar HOME STATION
ADSL ADB P.DG A4001N router on ADSL and 3G.
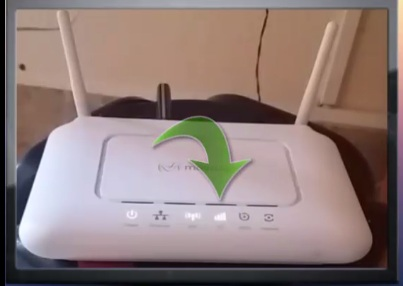
In this topic, I will provide you with a guide on how to set up the Movistar HOME STATION ADSL ADB P.DG A4001N router provided by the Spanish company Movistar. This router is good in terms of wireless connection speed, reaching up to 300mb/s. It closely resembles the Movistar HOME STATION AMPER ASL 26555 router in appearance, but it differs completely in terms of hardware. I will explain the setup process for this router for both ADSL and 3G to make the topic comprehensive, as some individuals may not have ADSL and wish to use 3G instead.

In this topic, I will provide you with a guide on how to set up the Movistar HOME STATION ADSL ADB P.DG A4001N router provided by the Spanish company Movistar. This router is good in terms of wireless connection speed, reaching up to 300mb/s. It closely resembles the Movistar HOME STATION AMPER ASL 26555 router in appearance, but it differs completely in terms of hardware. I will explain the setup process for this router for both ADSL and 3G to make the topic comprehensive, as some individuals may not have ADSL and wish to use 3G instead.
Configuring the Movistar HOME STATION router for ADSL
First, turn on the router and reset it to factory settings by pressing the Reset button for 10 seconds until the router’s light goes off. Wait for it to restart, then connect it to the computer using an RJ45 cable. Open the Google Chrome browser and enter the following command: 192.168.1.1/main.html. Press enter, then enter the username and password, which are both: user = 1234 and password = 1234. Now, we have accessed the router settings.
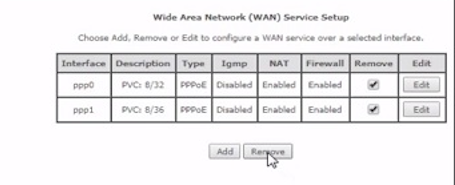
Navigate to the WAN Service tab, delete all existing settings by selecting Remove and then pressing Remove, as shown in the image below.

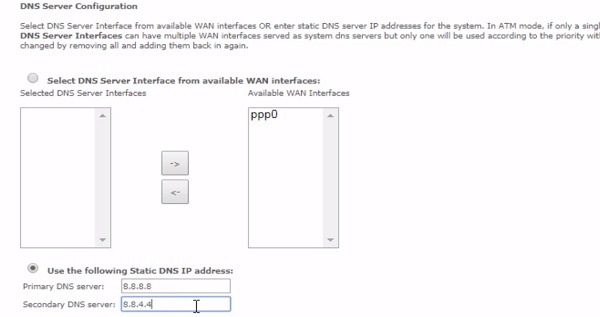
Then, move to the Layer2 interface tab and delete all existing interfaces. Now, click on Add to add a new interface, then fill in the appropriate data for VPI and VCI based on the regions (for Morocco, VPI=8 and VCI=35). Press the Apply/Save button. Next, go to the WAN Service tab and click on Add, then Next, and Next again. Enter your internet subscription details (PPP Username and PPP Password), then click Next, and Next once more. Choose ‘Use The Following Static DNS IP address,’ then enter 8.8.8.8 in the Primary DNS Server field and 8.8.4.4 in the Secondary DNS Server field, as shown in the picture below. Click on Next and then Apply/Save.

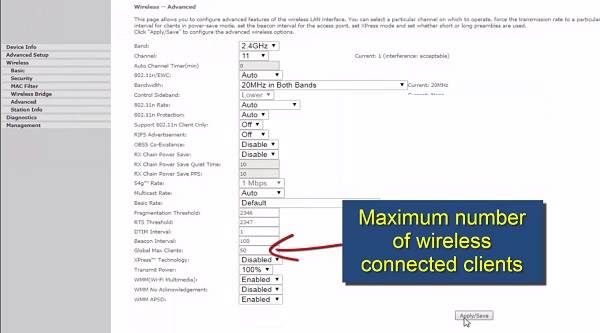
Now, let’s proceed to the wireless settings by clicking on the Wireless tab. Then, mark Enable Wireless to activate the wireless, as it is usually disabled in the default router settings. Next, change the network name, select the country, and press Apply/Save. Afterward, go to Advanced within the Wireless tab, choose the Wi-Fi channel (it is recommended to select it manually and not leave it on Auto), and select 20MHz in Both Bands under Bandwidth to avoid some wireless issues. Proceed to Global Max Clients to specify the maximum number of clients allowed to connect via Wi-Fi (the default is usually 16, which might be insufficient for larger families, so it’s advisable to increase this number to 50 or 100, for example). Finally, click on Apply/Save.

Configuring the Router for 3G:
- Access the router settings as previously explained, then go to the “Advanced Setup” tab, followed by “3G Key.” Change the settings as follows:
- Leave the “username” field empty.
- Leave the “password” field empty.
- In the “APN” field, enter “APN = internet.”
- Press “Apply/Save.” (These settings work with all networks and in all countries.)
- After changing the 3G settings, turn off the router, insert a modem compatible with the router (tested modems include: E173, K3520, K3765 – all Huawei modems), then turn on the router.
- Wait for approximately two minutes until the router recognizes the modem.
- Connect to the internet automatically without pressing anything.

